Checklists
A lot of business email starts a process rather than finishing one — a quote request, a service request, an insurance claim. Often the first message doesn't contain everything your team needs to act on it, and someone has to write back and ask. That back-and-forth is what Checklists are for: define what a given type of request needs, and ReplyFabric checks each incoming email — and anything attached to it — against that list before treating the request as complete.
Say a customer emails in a warranty claim but leaves out the invoice number and photos of the damaged product. A checklist doesn't judge whether the claim itself is valid — that's still your team's call. It just notices what's missing and sends a polite, automatic request for it, so the file is actually ready to work by the time someone opens it.
Find it under Checklists in the sidebar.
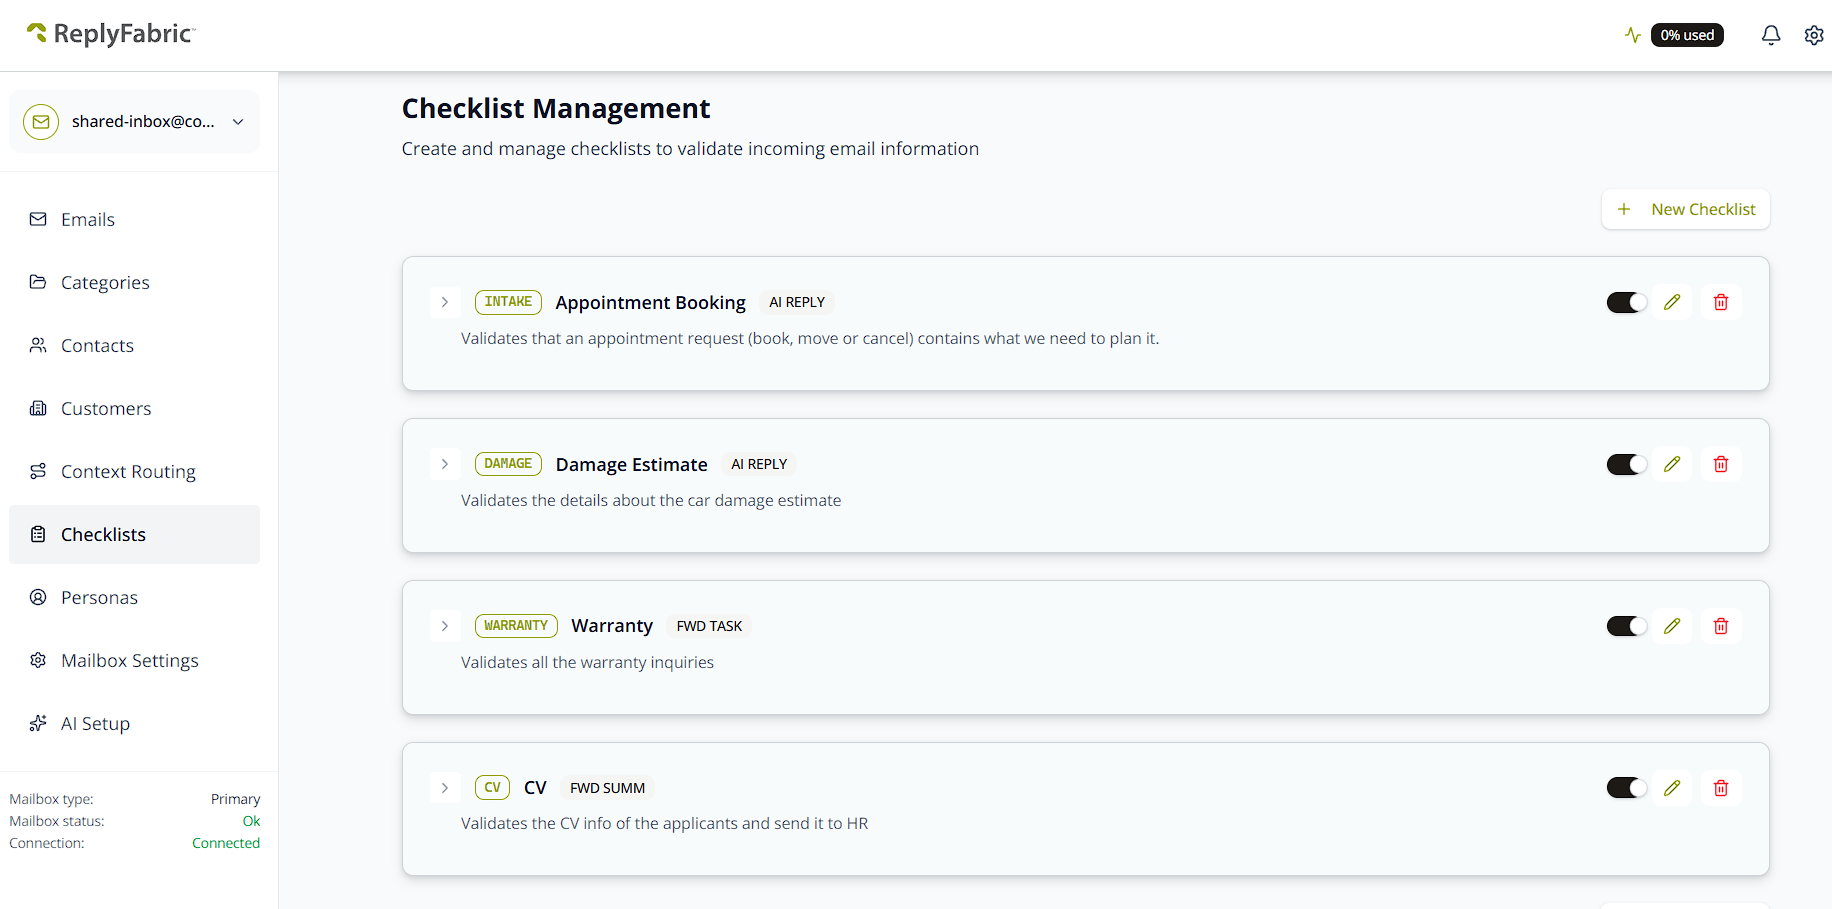
Checklists read attachments too: a required field can come from the email body or from an attached PDF, scan, or form (ReplyFabric uses OCR to read those) — a field counts as received either way, so customers aren't asked again for something they already sent as a document.
Creating a checklist
Click New Checklist to open the setup form:
- Code (required, up to 15 characters) — a short internal code, also used as the email's label.
- Name (required) — shown wherever you pick this checklist, including the intent Action dropdown later on.
- Description (optional) — a short summary of what this checklist validates.
- Additional AI Instruction (optional) — extra guidance injected into the prompt that evaluates incoming emails against this checklist.
- On Complete Action — what happens once every required field is present: AI Reply, AI Reply with Task, Forward, Forward with Task, Forward with Summary, or Forward with Summary & Task.
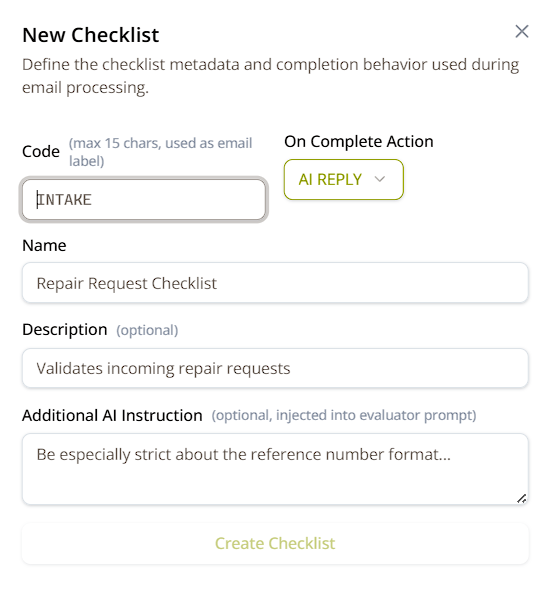
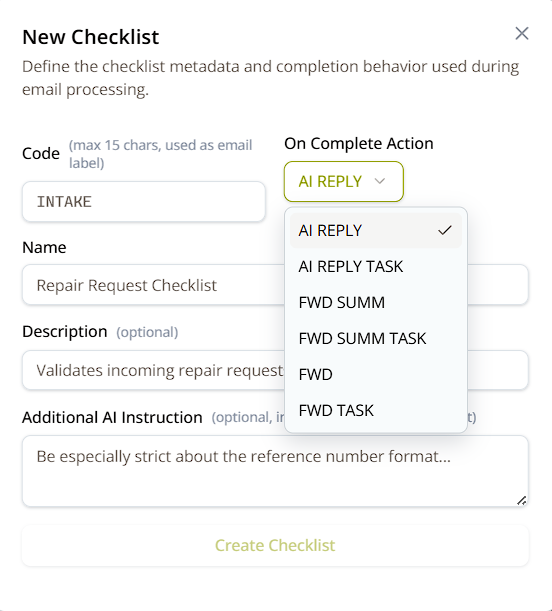
Saving here creates the checklist, but on its own it isn't running against any mailbox yet — that's the last step, linking it to a category's intent.
Adding fields (field keys)
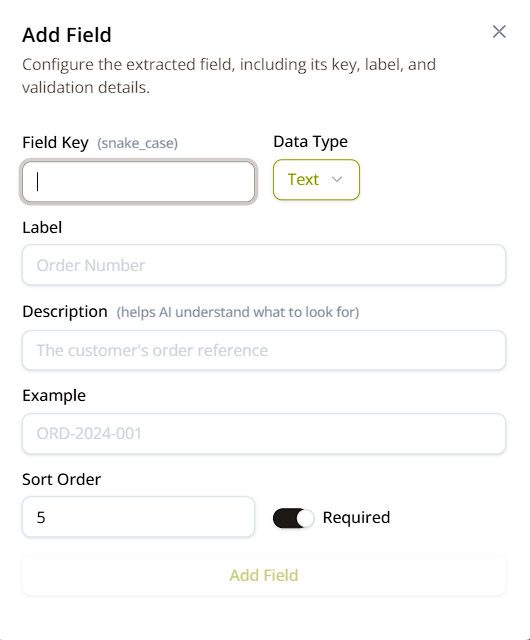
A checklist is only as useful as the fields on it. Click Add Field once for each piece of information the request needs:
- Field Key (required, snake_case) — the field's internal identifier, e.g.
order_number. - Data Type —
Text,Date,Number,Email,Phone, orReference. - Label — the human-readable name shown wherever this field appears, e.g.
Order Number. - Description — helps the AI understand exactly what to look for, e.g.
The customer's order reference. - Example — a sample value, e.g.
ORD-2024-001. - Sort Order — where this field falls in the list.
- Required — a toggle. Toggle it off for information that's nice to have but shouldn't hold up completion.
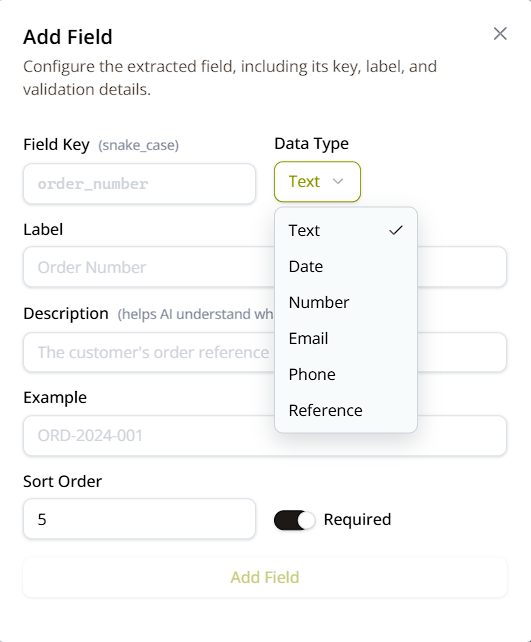
Repeat for every field the request needs, mixing required and optional as it makes sense. Here's a finished example — an Appointment Booking checklist with five fields, three of them required:
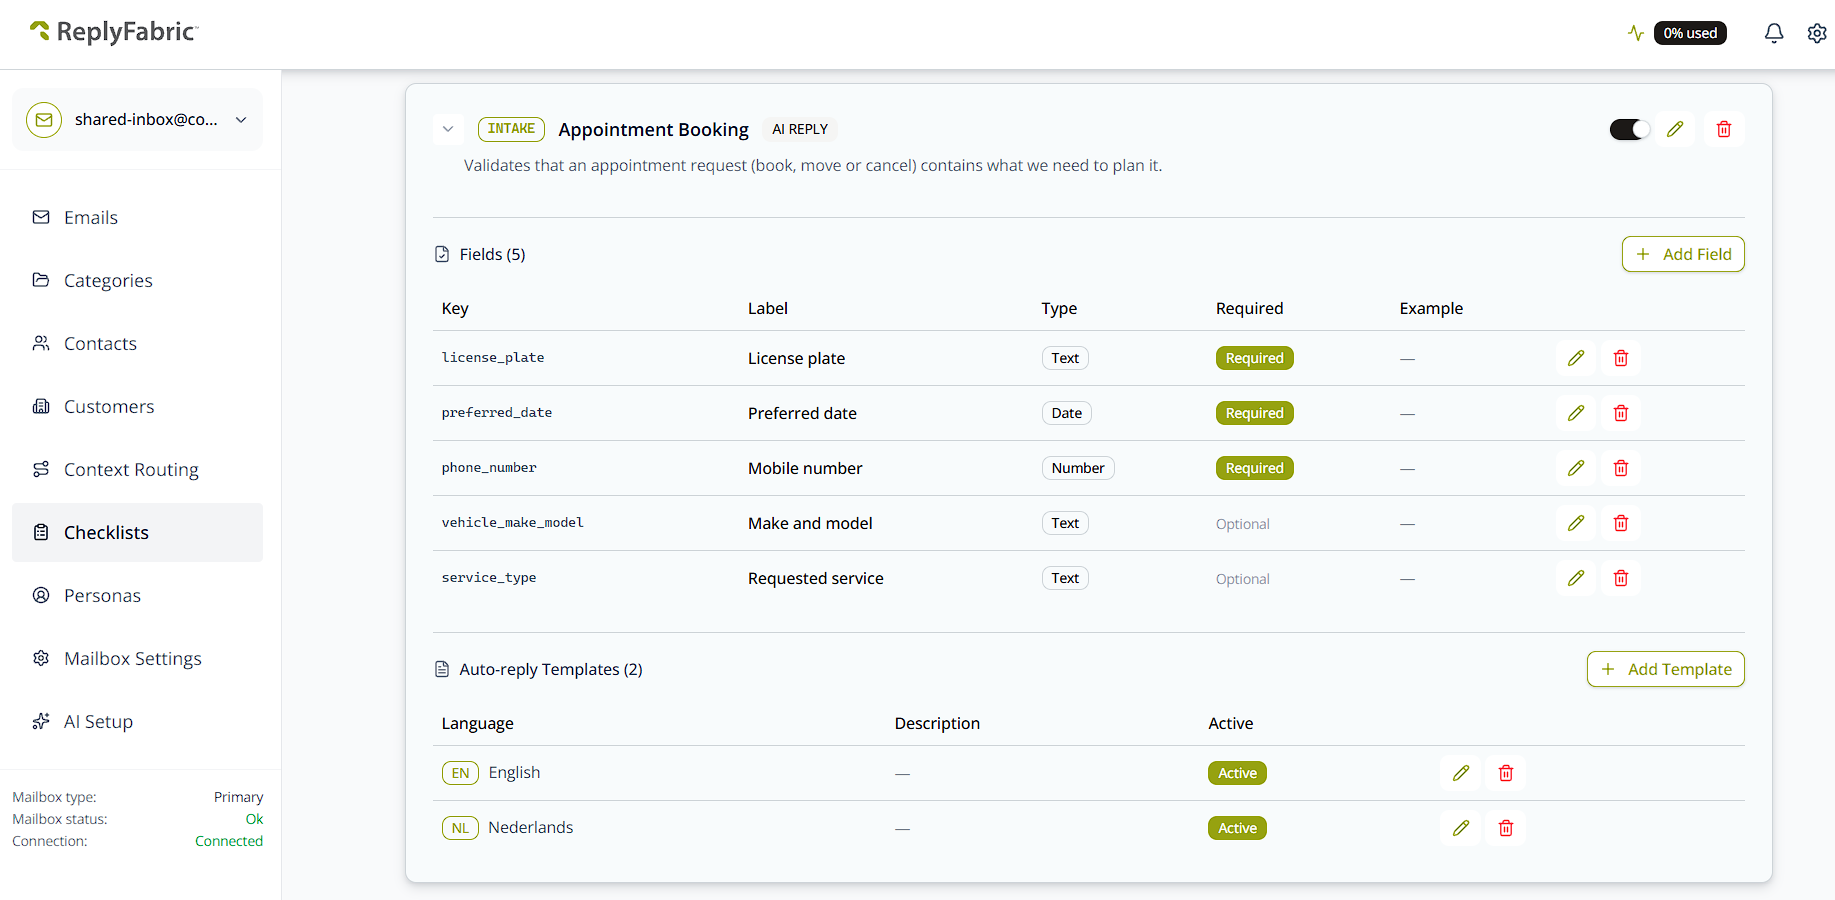
Auto-reply templates, per language
While a request is still missing a required field, ReplyFabric sends this template automatically — listing what's already been received and what's still needed. Once every required field is present, the checklist's own On Complete Action takes over instead.
Add one template per mailbox language:
- Language — which mailbox language this template is for.
- Description (optional) — an internal note about this template.
- Template Content — the reply body, written with these placeholders:
[ReceivedFields]— the checklist fields already confirmed, with their extracted values.[MissingFields]— the required fields still missing.[Recipient]— the sender's first name, falling back to their email address.[YourName]— the assigned responsible person, falling back to the category responsible, then the mailbox.
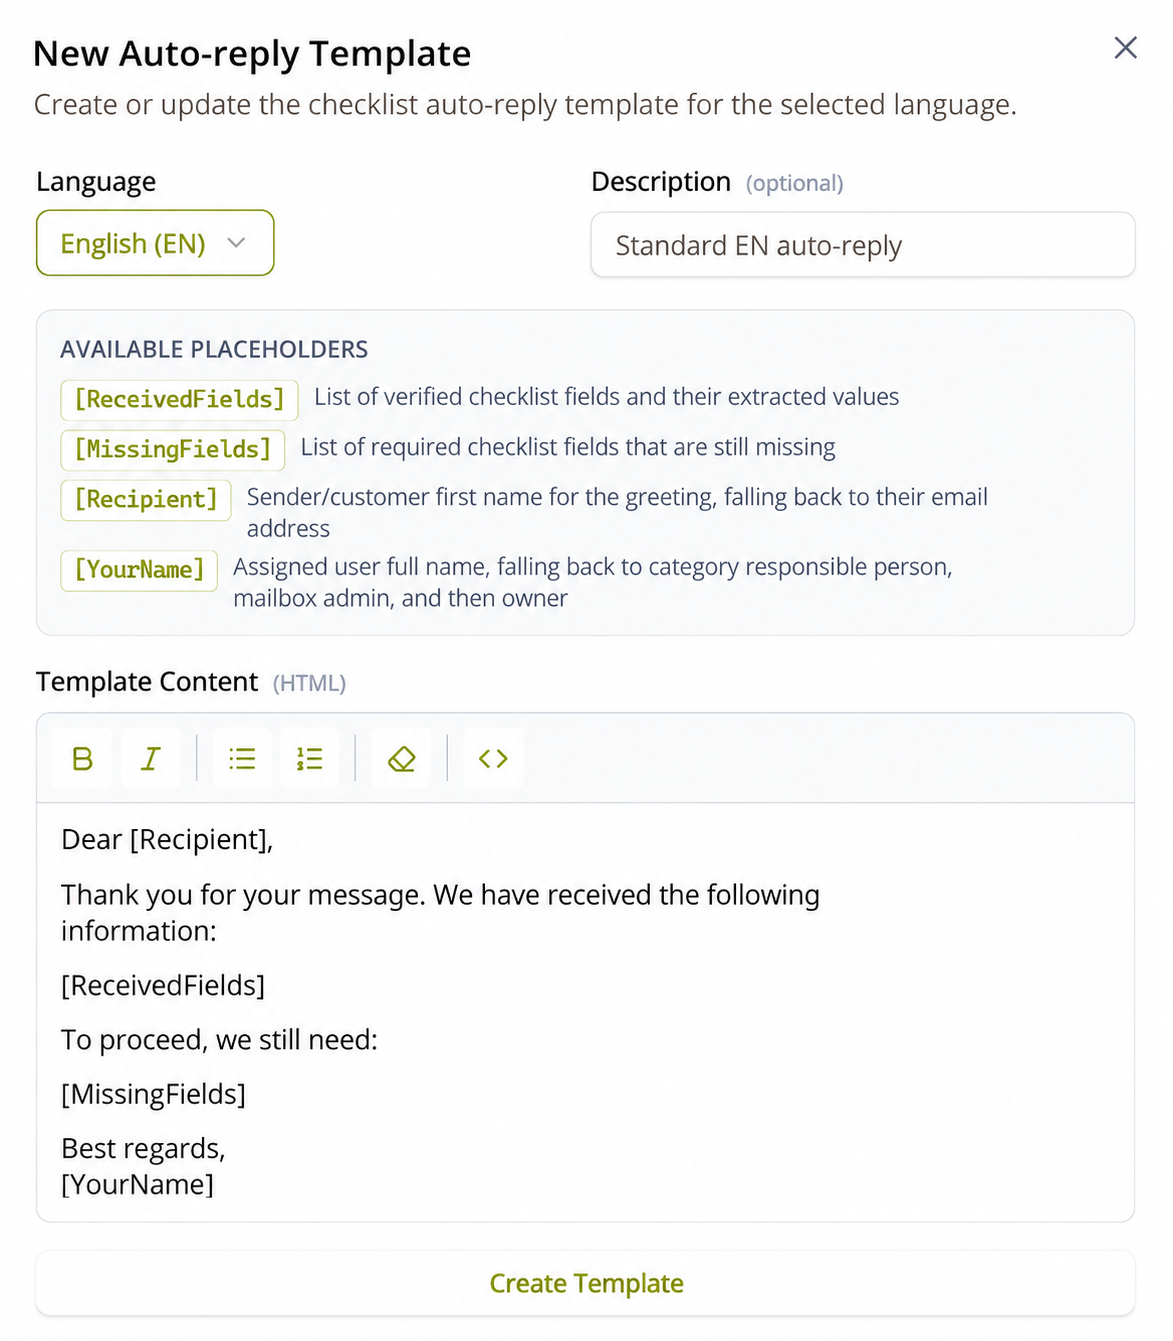
The finished example above shows exactly this: two active templates, English and Dutch, attached to the same checklist.
Linking a checklist to a Category's Intent
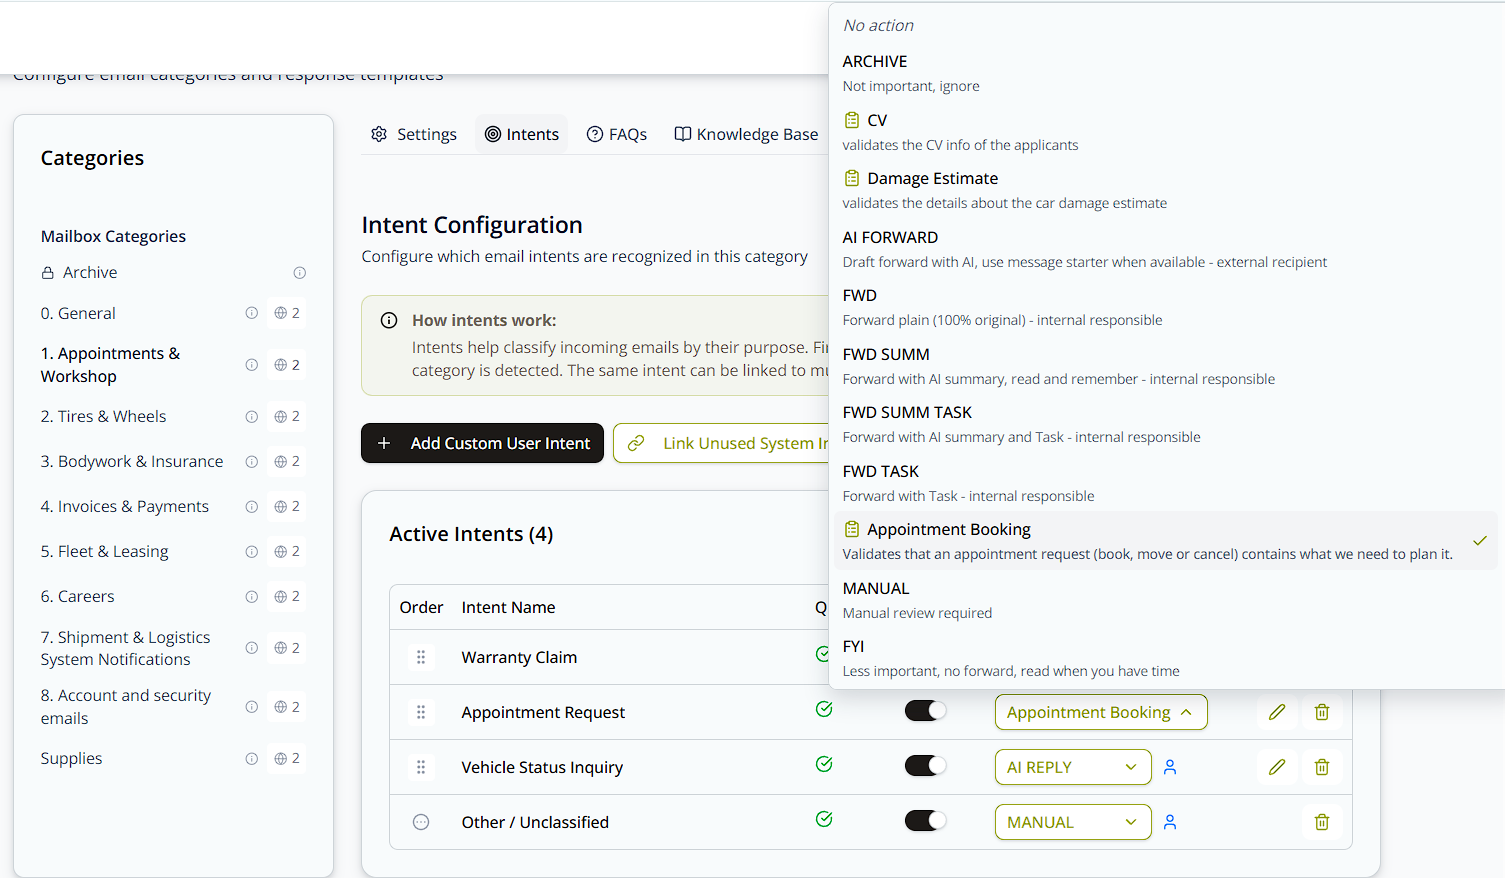
A checklist doesn't run against your mailbox until it's chosen as an intent's Action. From Category Management, open the category, go to its Intents tab, then open (or create) the intent that should trigger this checklist and set its Action to the checklist by name.
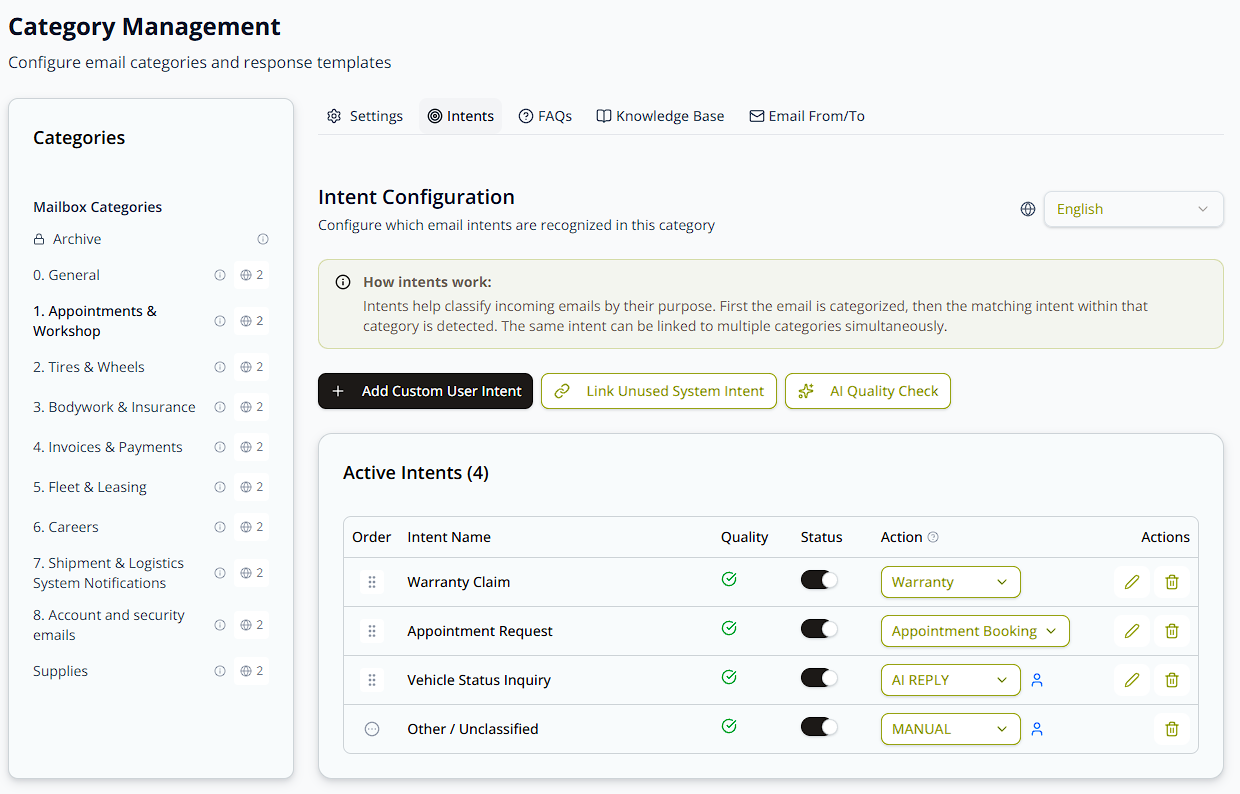
Saved checklists show up right inside the same Action dropdown as the built-in actions — Archive, the Forward variants, Manual, FYI, AI Forward — each marked with a small checklist icon:
What's next
- Category Management: Understanding Intents — how an intent is matched in the first place, before its checklist action ever fires.
- Category Management: Settings, Templates & Persona — the category an intent (and its checklist) lives in.